Saturday, August 25, 2012

Toddler fractions

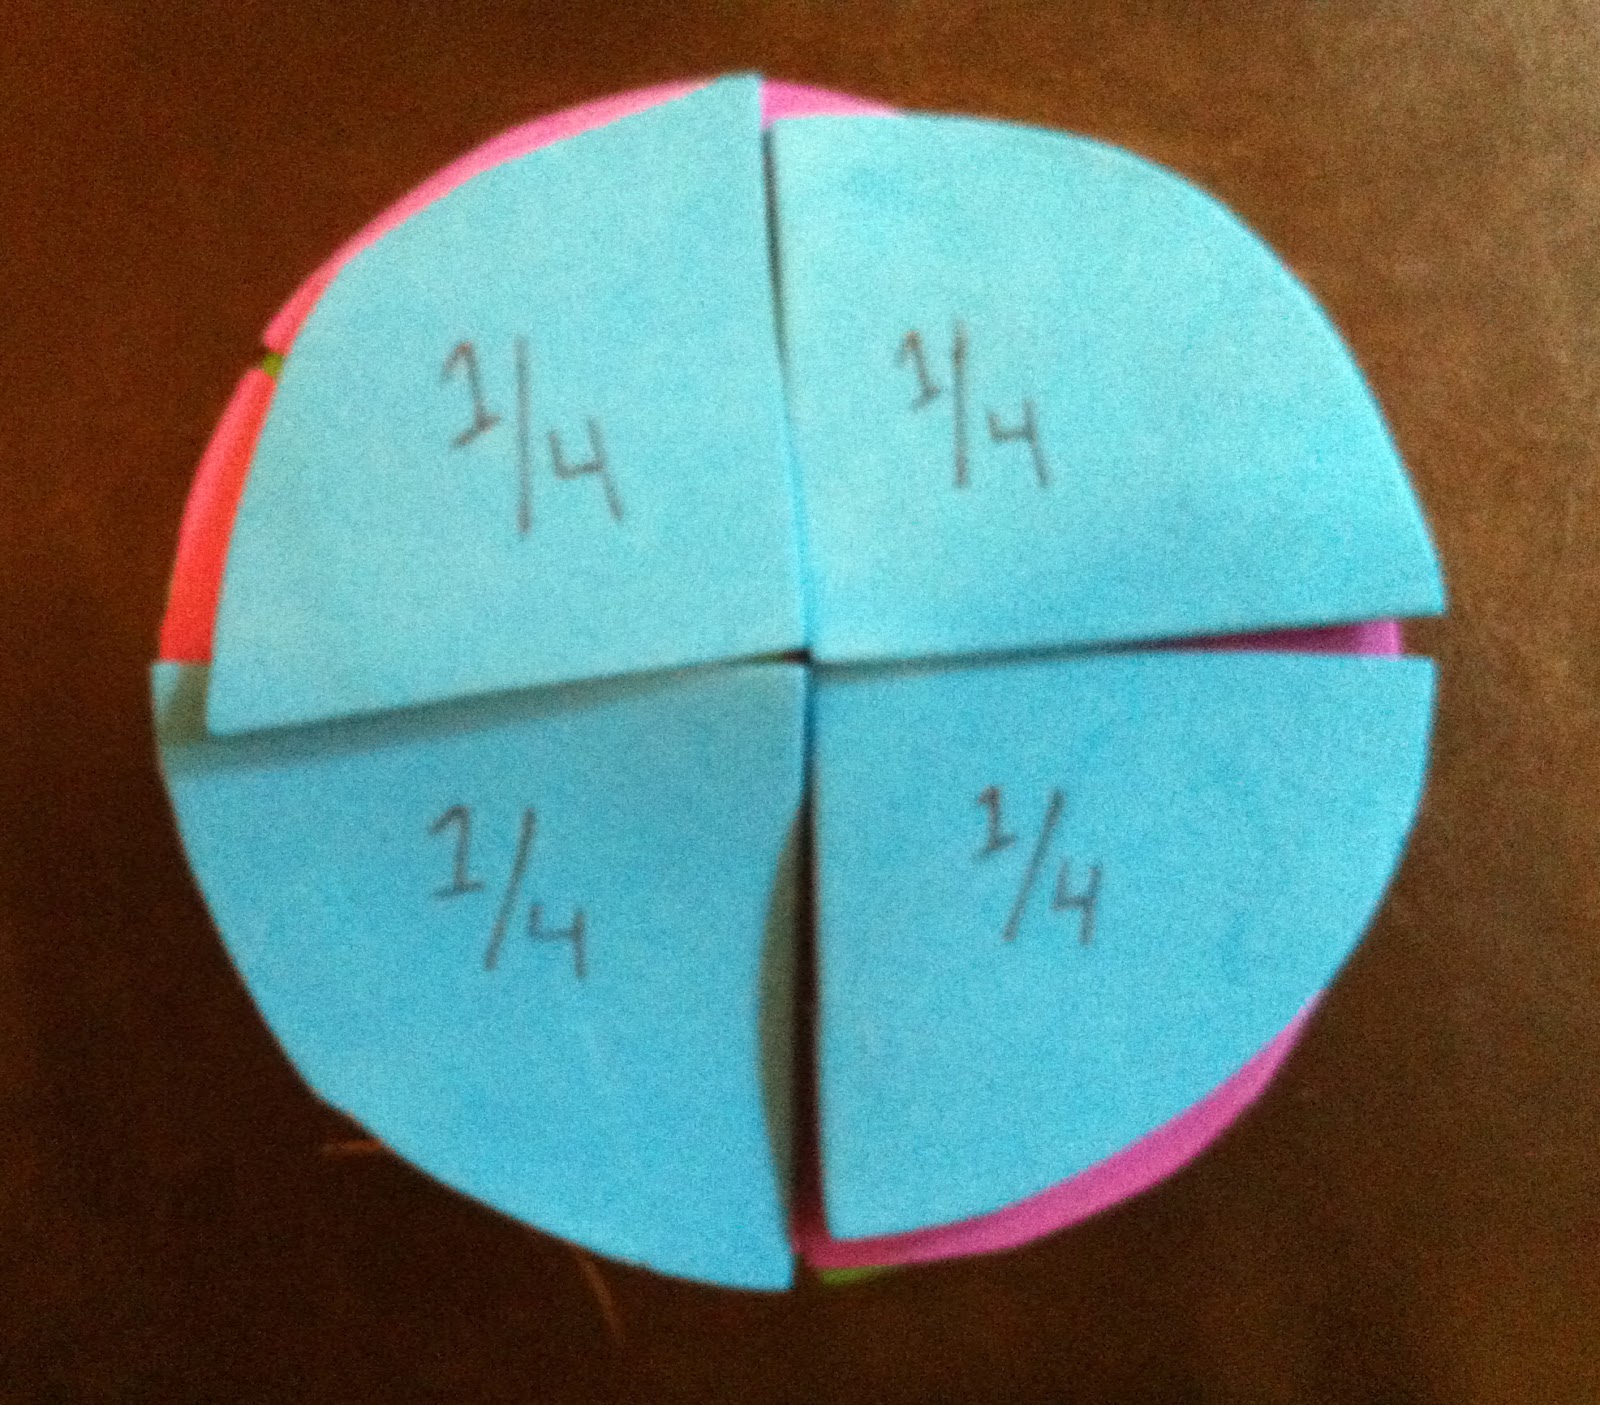
Confession: Ryan laughed at me when I made this. Probably because Ellie was something like 4 months old. But hey, I'm a planner!

I honestly didn't think she'd use it at all until much, much down the road, but she LOVES her circles! She collects the pieces, sorts them by color, counts each stack, and then asks me to stack them. We talk about what whole, half, third and fourth mean. She loves this activity and seriously does it with me nearly every day we play downstairs.

It was also ridiculously simple -- I just cut four circles out of thin craft foam, then eyeballed halves, thirds and fourths, and labeled them appropriately. I demonstrated once how the circle worked, and she has just run with it.


Friday, August 10, 2012

Fridge menu

I'm not really a baby-flashcard person. Or Baby Einstein. Or any of those things that promise to teach my 20 month old to read. I think that's kind of silly.

But I am a big fan of saturating our environment in printed text. This project is one of those things.

This hangs on our fridge and goes with us to the grocery store. Ellie can grab it to choose a snack, we can talk about what ingredients are going into a meal, or she can find things while we're shopping.


Here are the files if anyone wants to use them. The photos are all Creative Commons licensed from Flickr. Just print, cut, hole punch, laminate if you want. Add a nifty little binder ring and you're all set!

Friday, August 3, 2012

Triple pizza lunch

Ellie LOVES cooking. LOVES. She asks to get in her "tower" all the time and help me cook. She'll pour, stir and taste test as long as I'll let her.

We made a triple pizza lunch to give her a chance to really get her hands dirty in the kitchen.

First up was a bagel pizza:
She did a great job spreading sauce! (I forgot to get a picture of her sprinkling cheese because I was trying to keep her from shoving handfuls in her mouth)

Next up was veggie pizza. Daddy helped her spread the cream cheese. Love the tongue!

Adding carrots...

And cucumbers.

For dessert, we had peanut butter cookies with honey, ricotta and berries.

She sampled a berry. See my hand trying to tell her what to do with it?

DELICIOUS!

Tuesday, July 31, 2012

Tot time: texture painting

For our most recent tot time, we tried some painting with different textures. I gave each kiddo a piece of big paper and let them go to town -- in adorable little smocks from Ikea, of course. 

For toddlers, this was a crazy success. It kept three of them busy and entertained for nearly 45 minutes!

We used a mini paint roller, a loofah, a thin scrubbing sponge, two kinds of scrubbers with different handles, a few different paint brushes, a foam circle stamper, a Hot Wheels car and one of our dog's (clean!) rubber toys.


Beautiful artwork, little ones!

Thursday, July 19, 2012

Place setting

Ellie is such a helper these days (at almost 20 months old)! She loves helping set and clear the table, empty the dishwasher, feed Marah, and find the picture for her toys and clean up. I know this behavior is likely ever-so-short-lived, so I'm trying to capitalize on it while I can!

Part of this is incorporating some Montessori philosophy into our home -- letting Ellie be independent and self-reliant, even if things aren't done perfectly or quickly. In a book I was reading awhile ago, there was a beautifully simple idea for teaching kids to set a table -- a piece of cork with tracings of a plate, bowl, cup and silverware. That would be a little tricky for her now, so I made this placemat for Ellie last night.

Front (for now -- this is a picture of her actual stuff on our table):

Back (for later, when abstract concepts are a little easier):
Here's a PDF (11x17) of the back. Feel free to download it. It cost me about $7 to print and laminate both sides. Not too shabby.

Monday, July 2, 2012

Dollar store haul!

$33. For ALL of this. 

Yes, I got to do every mommy's dream, which is of course to shop alone. It was quite a productive trip, and included this bountiful haul from the Dollar Tree.


I got:

  • 3 pool noodles: for water table, "bead" stringing, and this idea
  • Rubber placemats: for painting/printing
  • A variety of sponges, loofahs and scrubbers, with different handles, textures and bristles: for water table and painting/printing (like this and this)
  • A pack of combs: for painting
  • A pack of sandpaper (different coarseness): for a variety of activities, like this
  • Fish sand mold: for sand table and beach
  • Mini loaf pan and measuring cup/spoon set: for her 2nd birthday play kitchen
  • A muffin tin: for muffin tin lunches (which we've been doing recently and she LOVES)
  • Brown paper bags: for a variety of activities, including this one
  • Glow sticks: to try all sorts of crazy ideas from Pinterest, like this

Thursday, June 21, 2012

DIY water/sand tables

Ellie loves water. This is just a fact. She loves playing in sprinklers, the pool, the bath, Marah's water dish, the bird bath, puddles, the sink...anything with water, the child loves.

Clearly we need a water table.

Clearly I am not spending $40+ on a plastic table, much less $100+ for a wooden one.

I found this lovely tutorial via Pinterest. I pretty much followed it to a T, but here is a recap with some clarifications.

Supplies:
  • Sterlite 41-quart underbed box ($9 at Wal-Mart)
  • 1x3 lumber 
    • I got the cheapest stuff. I'd recommend going a step up or getting a slightly larger cut. My wood was soft and I had to be very careful not to split it -- even if I drilled pilot holes.
    • You'll need 3 8' pieces (mine were about $4 each at Lowe's)
  • Screws (I used 6x1.5" wood screws for most of the pieces, but shorter 1" screws for where the legs attach to the long side pieces)
Step 1. Ask one of the nice Lowe's employees to cut your wood for you. Yes, you can do it yourself, but they will do it for free or very cheap. It is way worth it. You need:
  • 3 pieces that are 33 3/4" (long sides and bottom brace)
  • 4 pieces that are 16 5/8" (short sides and braces)
  • 4 pieces that are 22" (legs -- can adjust if you want taller or shorter)
This of course is only applicable if you use the same box I did.


Step 2. Build your frame. Make sure the short pieces are on the outside of the long pieces.


Step 3. Add legs to the outside, overlapping the two pieces.

Step 4. Add an extra short piece between the legs on each side as a brace. I used a piece of the same wood as a spacer. 

Step 5. Place the last long piece on the bottom, screwing it into the side braces you just added. 

Step 6. Put your Sterlite box inside! Plus, you can still use the lid.


I liked it so much, I made two! One is for water and one for sand (but one will go to our friends who are staying with us this summer, and I'll just eventually store the other bin underneath).


EDIT: Here's the first go of the water table. We ended up filling them both up. The kids loved it (big surprise, right? It's hot and water is just awesome.)