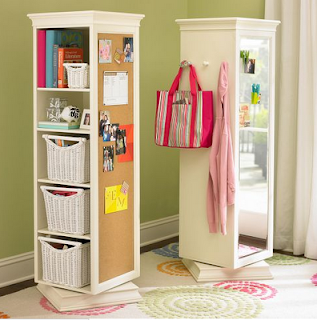
Here was the highlight:
Planting succulents together
I also really wanted to make progress on moving in to our new place, and on some Pinterest projects. So, I (mostly) finished building her rotating bookcase. This was a highlight in the personal productivity department.
Needless to say, I was not going to spend $600 on this. I liked the spinning aspect so that all four sides could be used. But it didn't quite fit my needs. My version is Ellie-sized, extra-wide on the sides (I added chalkboard vinyl to one side; I am going to add cork, felt, mirrors and/or magnetic boards to the other side -- I haven't decided yet), and moves as well as spins.
Materials:
- Two 3-shelf Closetmaid organizers (I got mine for $20 each at Lowe's)
- 6 6-hole metal plates (about $3 for a pack of 6)
- 3 9-hole metal plates (about $4 for a pack of 6)
- 4 casters. I wanted mine to rotate, roll and lock, so I got 2" swivel casters with locks (about $3 each)
- Screws. I used 36 screws -- 8x7/16" pan-head sheet metal screws (about $1 per bag of 16)
Total cost: $42
How to make it:
- Assemble Closetmaid shelves per packaged instructions.
- Flip both units over (take shelves out first). Line up cardboard backs so both shelf sides face out.
- Center a 9-hole plate in the middle of the units, to connect them. I used 4 screws for this plate. FYI, I have an aversion to drilling pilot holes for some reason, so I used Ryan's Makita, because it is freaking amazing and you don't have to predrill.
- Repeat with two more plates, one on each side, so there are three plates spread across the bottoms of the units to connect them.
- Repeat, using two 6-hole plates to connect on each side. I used two screws in each of these plates (so this step is a total of four plates and eight screws).
- Attach your casters to the corners of the entire unit.
- Flip the whole thing over. Use two more 6-hole plate on the top.
The whole thing took around an hour. I was expecting it to take much longer, but it went quite quickly with the Makita. Here's a view of the top. The bottom (which I forgot to get a picture of before I loaded up the shelves) has one additional plate in the middle, and they are the 9-hole plates.
I think I may add molding to finish it a bit, like the inspiration shelf. Otherwise, done and DONE!


No comments:
Post a Comment